The complete guide
How to do Jal Neti
It looks intimidating the first time and takes about five minutes once you've got it. Here's everything, in order.
Read this before anything else. Only ever use water that has been boiled and cooled to lukewarm, or water that is distilled or sterile. Untreated tap water is not safe for nasal irrigation — it can carry organisms that are harmless to swallow but not harmless in the nasal passages. This rule applies to every neti salt and every neti pot, everywhere.
Before you start
What you need
A neti pot
Clean and completely dry, with a spout that sits comfortably in the nostril. Never share a pot between people.
The right salt
Non-iodised, additive-free, fine grind. One level 5 g scoop of Ankurith Jal Neti Salt per 500 ml.
The right water
500 ml, lukewarm — around body temperature. Boiled and cooled, distilled or sterile. Never hot, never cold.

Step by step
The rinse
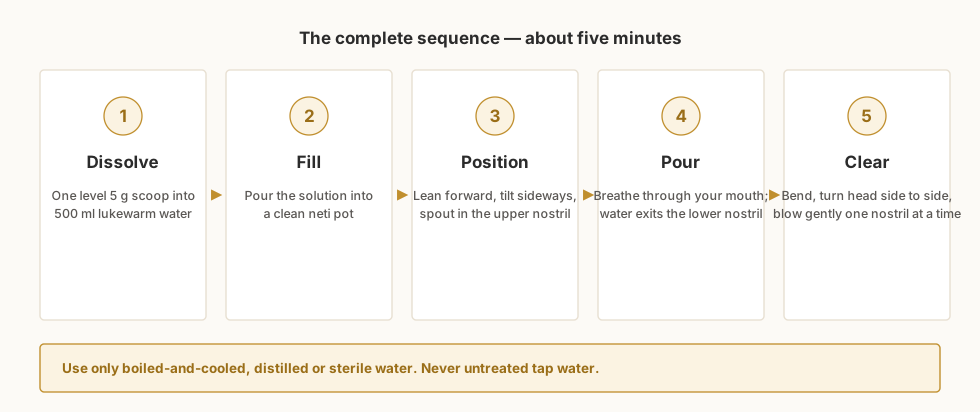
-
Dissolve the salt
Add one level scoop (5 g) of Ankurith Jal Neti Salt to 500 ml of lukewarm water. Stir until the water runs completely clear — if you can see anything settling, keep stirring.
-
Fill the pot
Pour the solution into your neti pot. Check the temperature on the inside of your wrist: it should feel neutral, neither warm nor cool.
-
Get into position
Stand or sit leaning forward over a basin. Tilt your head to one side so that one nostril is clearly above the other, and keep your forehead roughly level with your chin.
-
Pour, and breathe through your mouth
Rest the spout snugly in the upper nostril and pour steadily. Keep breathing calmly through your open mouth — this is what stops water going down your throat. The solution will run out of the lower nostril.
-
Switch sides
Use about half the pot on the first side, then straighten up, blow gently, and repeat on the other side with the rest.
-
Clear the passages
Blow your nose gently — never hard, and never with both nostrils pinched shut. Then bend forward and turn your head slowly side to side to let any trapped water drain out.
Getting it right
Six mistakes beginners make
Water that's too cold
Cold water stings and makes the whole thing unpleasant. Lukewarm — close to body temperature — is the target.
Eyeballing the salt
Too little salt burns; too much dries out the nasal lining. Use the measured scoop and the full 500 ml.
Breathing through the nose
The moment you inhale through your nose mid-pour, water goes where it shouldn't. Mouth open, breathing steady.
Head at the wrong angle
Tilt too far back and the water runs into your throat. Lean forward, keep the forehead and chin roughly level.
Blowing too hard afterwards
Forceful blowing can push water into the ears. Gentle, one nostril at a time, is all it takes.
Rinsing when fully blocked
If a nostril is completely congested, the water has nowhere to go. Wait until it eases, or check with your doctor.
Afterwards
Drying and aftercare
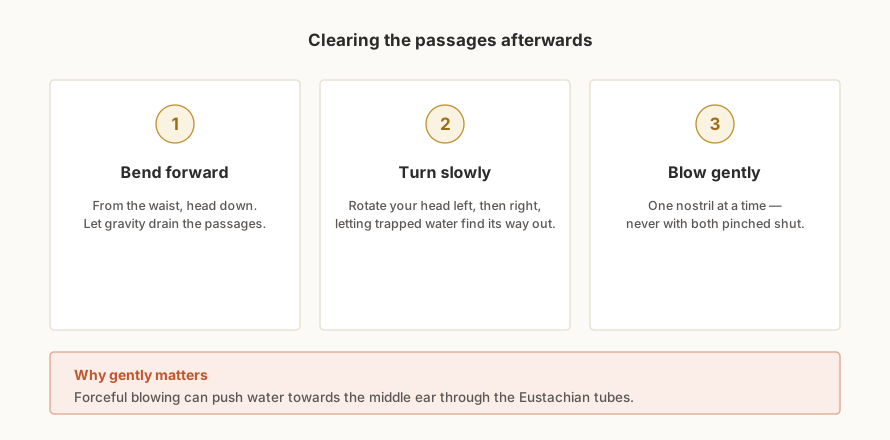
Any water left in the sinuses will drip out later, usually when you bend forward. To avoid that, finish every session by clearing properly:
- Bend forward from the waist, head down, and turn slowly left and right.
- Blow gently through each nostril, one at a time.
- Traditionally, a few rounds of rapid exhalation (kapalabhati) are used to dry the passages — go gently, especially at first.
- Rinse the pot with clean water, then let it air-dry completely before you put it away.
Timing
When to practise
Morning, on an empty stomach, is the classical time — and it works well because it clears whatever settled overnight before you start the day.
If you're new to Jal Neti, start with two or three sessions a week and let your nose adjust. Many regular practitioners settle into once daily. Avoid rinsing right before bed, since residual water may drain while you're lying down.
Leave at least a few minutes between the rinse and any pranayama — clear passages are exactly why the two are traditionally paired in that order.
Important
When to check with a doctor first
Jal Neti is gentle, but it isn't right for everyone at every moment. Speak to a qualified healthcare professional before you begin if any of the following apply:
- You have had nasal, sinus or ear surgery recently
- You have a current or recurring ear infection, or blocked ears
- You have a perforated eardrum
- Your nose is fully blocked and stays that way
- You get frequent nosebleeds
- You have a structural issue such as a significantly deviated septum
- You are managing an ongoing ENT condition of any kind
Children should only practise under adult supervision and after speaking with a doctor. If a rinse causes pain, bleeding, or ear discomfort, stop and seek medical advice.

Take it with you
A Simple Guide to Better Breathing
The same guidance, illustrated and printable — free with every jar of Ankurith Jal Neti Salt, and free to download here.